Thursday, December 1, 2011

Crime Scene Investigation

For the Crime Scene Investigation, I was assigned to Scene 1 with seven other people. Once we "arrived at the scene," we each took one or two of the eleven pieces of evidence to analyze. I had the footprinting clue, where there was what looked like the bottom of the victim;'s shoe and and image of a shoe-print that was pointed in the direction away fromt he crime scene. Below is all of the information and analysis of the clues:

       Background Information:
A dead body was found decaying in an open field by the woods.

                                 
Analysis of Clues:

Exhibit 1: Handwriting: Forged suicide note: "Please forgive me. I do love you all."
                                 : Characteristics include large loops, semi-connected letters 
                                 : Note: Handwriting changes throughout the note, the victim DID NOT write it.
Exhibit 2: Hair: Caucasian, short (boy?)
Exhibit 3: Fingerprint: Plain arch
Exhibit 4: Poison: pH between 7-8, cocaine tested positive.
Exhibit 5/6: Pictures: The pictures are of maggots and a decayed face. The maggots show that the victime is in the "active decay" stage. This means the body was found approximately 20-50 days after the victim was killed. The face/body has undergone botynic fermentation.
Exhibit7: Footprinting: Shoe found on victim's foot: height: 6 7/8 inch
                                                                                      : Width: 4 inch
                                                                                      : Looks like an athletic/running shoe. It s very small, which leads me to believe that the victim was a child, most likely a boy.
             : Suspects foot/shoeprint: Height: 11 inch
                                                  : Width: 4"
                                                  : It is an athletic/running shoe. The size and type of indicates that the person who committed the crime was most likely a man. The print was found walking away from the scene.
Exhibit 8: Lift Print: The fingerprint found on the scene was an ulnar loop.
Exhibit 9: Fingerprint: Another print found on the scene, a double loop, possibly the victim's.
Exhibit 10: Fiber: Black, long string. Under the micrso scope it looks like nylon. 
Exhibit 11: Syringe: Could have been used to drug the victim.

Possible Suspects:
After our analysis of the clues, we identified three possible suspects as Courtney Smith, Jet Trong, and Lucas Moore. After further analysis, we determined the perpetrator to be Lucas Moore because of the finger prints, footprints, handwriting, and facts about him

The Final Story:


Lucas Moor's wife divorced him, and took his young son with her. Soon after he fell into a deep depression, went crazy, and was admitted into a pchysiatric ward. He broke out and stole cocaine. He left a suicide note for the mother, planning to take his child. He waits in the woods for his son to pass by on his way home froms school. Spotting his son, Moore jumps out of the woods and tries to take the boy. The child fights back, which explains the missing tooth of the victim and the handful of short, caucasian hair. Moore tried to drug his child, but accidentally killed his son during the stuggle, so he left his son on the field by the edge of woods and the fled the seen.


Monday, November 28, 2011

Poison Activity

Research:

1) Definition of poison- substances that can cause disturbances to organisms, usually by chemical reaction, when a sufficient quantity is absorbed by that organism.
2) Common poison sources: bites
                                          : medicine (overdose)
                                          : food (allergies/rotten)
                                          : plants
                                          : household products (ex/ bleach)
                                          : lead
                                          : carbon monoxide
3) How do crime labs handle poison cases? What are some signs of poisoning?
                                          : enlarged pupils
                                          : sight of injection (bruise, etc.)
                                          : foaming/drooling
                                          : skin discoloration
                                          : excess vomit
                                          : vessels burst= extensive bleeding from the inside out
                                          : elevated heart/breathing rate


Class Activity:

For this activity, we had to use various reagents to identify which substance was a specific poison out of multiple unknowns. Here are my results of the experiment:
 1) Metal Poisons: Info: Chromium turned orange when acidified  
                                  : Lead forms a yellow precipitate when KI is added
                                  : Iron turns blood red when KSCN is added
                          : Results: Unknown 1 is lead
                                       : Unknown 2 is iron
                                       : Unknown 3 is chromium
Sample 2: The substance on the very right
turned blood red when KSCN was added
2) Sugars: Info: When sugar test reagent is added, a purple color will form.

                        : Results: All tests responded negatively. All of the unknowns were colorless, but then turned blue when the reagent was added.

All samples tested negatively

3) Household Ammonia: Info: An odor is present
                                            : pH is above 7 (solution is basic)
                                            : phenolthaline is pink/purple in solution (solution is basic)
                                      : Results: Unknown 2 tested positive for all three tests

4) Aspirin: Info: Bromythymel Blue will be yellow (solution is acidic)
                      :pH is below 7 (solution is acidic)
                : Results: Unknown sample 1 turned yellow in the BTB and had the pH paper indicated a pH of 2
                           : Other samples did not turn yellow and the pH paper indicated that both unknown 2&3 had a pH of 8

These are all three of the samples. Sample 2 tested positively because it
turned yellow when BTB waas added and the pH paper turned red,
indicating a pH of 2.
5)Cyanide: Info: Turns blood red when Fe+3 is added
                : Results: All unknown solutions were clear, but sample 2 turned red after the reagent was added.

These are all three samples.
Sample 2 is cyanide because it turned
blood red after Fe+3 was added.
6) Iodine: Info: Turns blue/black when starch is added
               : Results: Unknown 1 remained yellow
                           : Unknown 2 remained red
                           : Unknown 3 was is Iodine because it was originally clear but turned blue after the chemical reaction took place.
Unknown Sample 3 turned blu-ish
when the starch was added.

Monday, November 21, 2011

Drug Analysis

As part of the exercise, we were required to gain background knowledge of cocaine, LSD, and meth before we started the experiment. Here is the information I gathered:
Cocaine:
     Correct Chemical Name: benzoylmethylecgonine
     Correct Chemical Formula: C17H12NO4
     pH: 7.2
LSD:
     Correct Chemical Name: Lysergic Acid Diethylamide
     Correct Chemical Formula: C20H25N3O
     pH: 4
Meth:
     Correct Chemical Name: N-methyl-1-phenyl-propan-2-amine
     Correct Chemical Formula: C10H15N
     pH: 12.8

Class Activity:
Drug 4

Drug 1
For the Drug Analysis Lab, we were given 6 unknown drugs. For each we had to determine the pH and identify each as cocaine, LSD, or meth through the use of vrious reagents. Here are our results:
DrugpHCocaine Reagent (turns blue)________LSD Reagent (turns yellowMeth Reagent
14negative
negative
positive
29positive
negative
negative
33negativepositive
negative
48positivenegative
negative
512negativenegativepositive
64negativepositivenegative


 This lab would be helpful in an investigation because it can further develop the profile of possible suspects; you can identify and illegal substances were used. 

Thursday, November 17, 2011

Footprints

In my group of four we each made and footprint in dirt like this:


My Footprint
  After each footprint was made, we filled out a data sheet that required information such as the length, width, defining characteristics, subtrate, and weather conditions. It is important to know the climate of where the footprint was found and the terrain, or substrate, on which it was taken. Examples of possible substrates include dirt, mud, sand, and concrete. Footprints help us identify the approzimate size of a suspect and what type of shoes they were wearing when they comitted the crime. Also, if there are any disinct markings, such as a dent in the heel, that marking could be analyzed and then be compared with the shoes of the suspects.

After the practice, I came to the conclusion that footprints/footprinting is more helpful when trying to eliminate suspects rather than identify the individual the committed the crime. I thought the exercise was rather simple and footprinting is one of the easier aspects of a crime scene to analyze because footprints are easier to identify than, for example, fingerprints and hairs/fibers.

Wednesday, November 16, 2011

Witness Experiment

The purpose of this experiment was to determine if you would make a good witness at a crime scene.


For this exercise, we cut pictures of people's faces (similarly sized) out of various magazines. After we obtained the faces, we cut them up into individual facial features, such as the nose, eyes, mouth, and hair. Then, all of the same features were put into put into piles and your partner made a new face by picking one feature from each pile. One a new face was created, we were given 10 seconds to memorize it before each feature was put back into its pile. We had to then try to re-create the face our partner made.

In conclusion, this exercise was used to determine if you would be a good eye-witness based on your ability to memorize the distinct characteristics of a person's facial features.

I think I have a pretty good memory and would make a great eye-witness because I did really well in this experiment; I easily re-created the faces my partner made.

Tuesday, November 15, 2011

Create a Profile

For this activity, we were supplied with five individual pieces of evidence such as a set of fingerprints, two hair or fiber samples, a handwriting sample, and a lip print or blood sample. We were required to analyze each clue and determine if we could identify the type of person might have committed a crime and left these clues at the scene.

As a group we had to analyze each exhibit and record what we knew for sure, what needed more testing, and what we didn’t know. In the end, we determined the perpetrator was most likely a female African American. Also, we were led to believe that there was a Caucasian female on the scene. After reviewing our pieces of evidence, we discovered that there was a struggle between the victim and the suspect which resulted in the death or injury of the victim.

This exercise required us to use all of our forensics knowledge because we had to apply what we learned in fingerprinting, hair and fiber, handwriting, and lipstick in order to create a profile for the suspect of our crime. This technique of analyzing all clue to form the profile for the suspect of a crime is extremely useful in investigations because it is used to identify all of the possible people who committed the crime.

Monday, November 14, 2011

Lipstick

During the lip printing activity, we used lipstick to make our own lip prints on an index card. As seen in he picture below, we had to analyze our own prints and label 5 defining characteristics. Then, we were put into groups of 3-6 where we all put our prints onto a single sheet of paper. We then gave the piece of paper with the group's prints and our individual prints to another group. The other group then had to match each individual print to one of the prints on the big piece of paper by analyzing the distinct characteristics of each print and comparing them to the "unknown" prints.

After the preliminary practice, I have decided that it is not that difficult to identify the distinct characteristics of an individual's lip print, but our exercise was not very realstic. I don't think that it will be ver common to find full, clear lip prints on a crime scene; they will most likely be partial and smudged. Also, the prints would not be found on a white piece of paper; I believe it is most probable to find the prints on the victim.

Sunday, November 13, 2011

Handwriting

History of Handwriting Analysis:
1611: Prospero Alorisio’s manuscript is probably the first book to describe how to analyze handwriting.

1830: Abba Michon became interested in handwriting analysis. He published his findings shortly after founding Sociate Graphologique in 1871. The most prominent of his supporters was J. Crapieux-Jamin who rapidly published a series of books that were soon published in other languages. Starting from Michon's integrative approach, Crapieux-Jamin ended up with a holistic approach to graphology.

1920s: After World War I, interest in graphology continued to spread in Europe as well as the United States.

1929: Milton Bunker founded The American Grapho Analysis Society teaching Graphoanalysis. This organization and its system split the American graphology world in two. Students had to choose between Graphoanalysis or Holistic Graphology.

1942: Thea Stein Lewinson and J. Zubin modified Klage's ideas, based upon their experience working for the U.S. Government, publishing their method of handwriting analysis.

Handwriting Workshops Unlimited was organized by Charlie Cole as a series of lectures for advanced students of Graphoanalysis. These lectures featured holistic graphologists such as Thea Lewinson and Klara Roman. By 1960 all of the participants had been expelled by IGAS. These individuals went on to form the American Handwriting Analysis Foundation. Later mass expulsions of IGAS members led to the formation of other societies, such as the American Association of Handwriting Analysts that were orientated towards Holistic graphology.

1976: The Council of Graphological Societies formed from the unification of the American Handwriting Analysis Foundation and the American Association of Handwriting Analysis.

Early 1990s: Due to the rise of the internet, graphology organizations have suffered major declines in membership.

12 Handwritng Characteristics:
1. Line Quality: Do the letter flow or are they written with very intent strokes?

2. Spacing of words and letters: What is the average space between words and letters?

3. Ratio of height, width, and size of letters: Are the letters consistent in height, width, and size?

4. Lifting pen: Does the author lift his or her pen to stop writing a word and start a new word?

5. Connecting strokes: How are capital letters connected to lower-case letters?

6. Strokes to begin and end: Where does the letter begin and end on a page?

7. Unusual letter formation: Are any letters written with unusual slants or angles? Are some letters printed rather than in cursive?

8. Pen pressure: How much pen pressure is applied on upward and downward strokes?

9. Slant: Do letters slant to the left or right? If slany is pronounced, a protractor may be used to determine the degree.

10. Baseline habits: Does the author write on the line or does the writing go above or below the line?

11. Fancy writing habits: Are there any unusual curls or loops or unique styles?

12. Placement of diactrics: How does the author cross the t's or dot the i's?


Handwriting Analysis Activity:
In groups of four, we all wrote the following sentence in print and cursive on a piece of paper:

"The quick brown fox jumps over the lazy dog."

 
We wrote this specific sentence because contains each letter of the alphabet at least once. We then gave the paper to someone else in our group so they could use the list of 12 handwriting characteristics that we were given (see above) to identify the defining characteristics of the person's handwriting. Next, we tried to freehand forge that person's handwriting by re-writing that sentence. We also traced it onto another sheet of paper. I had some difficulties trying to recreate some one's handwriting; it would look very similar in the beginning, but towards the end of the sentence the handwriting looked more like my own. I think this happened because to properly forge someone else’s handwriting I had to go very slow and I didn't have the patience for it. It was extremely difficult to remain consistent in the size of the loops in their letters, the pressure of the writing utensil, the placement/slant of the words, the dotting/crossing of certain letters, etc. Tracing was easier, but still very difficult. It is very hard to imitate how much pressure the person applies to their writing, how thick the lines of their letters are, and the slant/curve of their lettering. However, I did find tracing to be much more effective in producing a more exact copy to the original handwriting than freehand forging. When trying to identify forgeries, I believe it is best look for inconsistencies within the writing such as some “ys” having loops while others do not. For tracing forgeries, you have to trace someone’s handwriting at a rather slow pace to get the best results, so I think it is best to try to identify shakiness and the pressure applied to the writing.


Check Activity:
For the second part of the exercise we each wrote a fake check and ripped it up into small pieces. We then gave our ripped up checks and our original analyzed sentences to another group. Each group then tried to piece the fake check back together and identify who wrote it by analyzing the defining characteristics of the handwriting of the check and comparing to the original sentences.

Overall, I thought the exercise with the checks was not difficult at all. The most difficult part for me was putting the check back together, but I easily was able to identify who wrote the check once it was together. Everyone in my group was able to identify the person who did the forged checks the receive, as well. The characteristics that were the most distinguishing in my analysis were line quality, ratio of height, width, and size of letters, and unusual letter formation.

Famous Case:
A famous case that demonstrates how graphology can be effective in solving crimes occurred on July 4, 1956. Mrs. Morris Weinberger left her 33-day-old baby, Peter, in his carriage on the patio in the backyard of their home in Westbury, Long Island. Although she had been gone for only 15 minutes, when she returned she found the carriage empty and a ransom note that stated a demand for $2,000 and was signed, "Your Baby Sitter." On July 10, the Weinbergers received a telephone call and a second note from the perpetrator.

Under the law at that time, the FBI could not enter a kidnapping case until seven days had passed. Once that time period had been observed, experts began immediately to study the kidnapper's notes. It was decided that the ransom notes had been written on a piece of paper that appeared to have come from a lined tablet designed for use in writing public records. Distinctive aspects of the kidnapper's writing included a peculiarly looped capital "P," a rounded "A" with a short tail, and a capital "Y" that was strangely bold.

Six weeks after Peter Weinberger had been taken from his carriage, a group of handwriting analysts managed to match the handwriting on the ransom note to that of a signature by a man who had received a suspended sentence. It was the 1,974,544th document that had been studied during the desperate search for baby Peter.

Tragically, the kidnapper, Angelo John LaMarca, had panicked on August 23rd and left the baby in a dense thicket to die. The kidnapper was found guilty of murder and died in the electric chair.

Although handwriting analysis may provide valuable leads that in some cases may lead to the discovery of the perpetrator of a crime and that person's subsequent arrest, the testimony of graphology by itself has not been accepted by appellate courts in the United States. In spite of the claims made by graphologists, the courts have ruled that it does not meet the requirements of the kind of science.

Saturday, November 12, 2011

Hair/Fiber Analysis

History:

The importance of hair and fiber analysis and its significance in crime investigation was realized in the early stages of forensic science. In the early twentieth century, the trichology field expanded considerably once the examination of hair microscopically was discovered. Hair and fiber analysis is still widely used in forensics today and has helped solve numerous criminal cases since its discovery.
1857: The world was introduce to the idea that analyzing hair and fibers could be useful in identifying criminals through the publication of one of the first scientific report involving hair and fiber analysis (trichology) in France.

1899: Francois Goron, a forensic scientist, noticed one key detail of the unknown victim: their dyed hair. This discovery led the scientists to uncover the identity of the victim.
1910: The Hair of Man and Animals was published by forensic scientists Marcelle Lambert and Victor Balthazard, which includes many microscopic studies of hair from mammals.
1977: Professor John Glaister published his Hairs of Mammalia from the Medico-legal Aspect. It soon became a reknowned resource for hair and fiber analysis. Also, John Hick’s Microscopy of Hairs: A Practical Guide and Manual became an important tool for forensic experts because it laid out the groundwork for using hair examination as a form of police work.
Class Activity:

                                         A Complete Hair:
Major Types of Fibers:
Each type of fiber has distinguishing characteristics when viewed under a microscope:
Cotton:

Polyester:

Wool:

Nylon:

Silk:

 Collection Techniques:
During collection of hairs and fibers at a crime scene, each individual hair or fiber is its own peice of evidence. The most obvious technique for collecting hair and fiber is to pick it up with your bare hand and then placed in a safe location, if the specimen is large enough. Hairs can be put into envelopes (only if the envelope can be sealed) and then marked. If a hair is attached to another object certain steps have to be taken. For example,  if a piece of hair is attached to a small object, such as a shard of glass, then both the object and the hair are placed into an evelope as one piece of evidence and then marked. Consiquently, if the object is too large, then the area around the hair must be wrapped in paper to prevent loss of hair evidence. Tweezers can be used for removal of hairs or fibers if necessary, but hairs and fibers are most commonly picked up with someone's bare hands to be collected.

Analysis:
Both hairs and fibers are analyzed under a microscope, but their analysises help determine different things. Hairs help identify the race and relative age of a person. Also, the condition of the the root may help identify how the hair was removed from the body, whether it feel out, was ripped out, or was cut off.  DNA may be extracted from from a piece of hair to help identify the possible suspects/victims, as well. Contrarily, fiber evidence is analyzed to associate a suspect through statistical elimination. Fibers found at a crime scene must be able to be linked to a possible suspect.

Reliability:
Results bases soley off of hair and fiber samples is rarely considered definite, but this evidence is usually able to help form a significant lead in a criminal case. Statistical elimination ultimately can not be used as conviciton-worthy evidece, but is helpful in minimizing a list of suspects. Only DNA extracted from a hair sample is 100% reliable and conclusive.

Landmark Case:
One of the most famous cases using Hair or Fiber Analysis was the Atlanta Child Murders case. Victims were found in rivers wrapped in shower curtains, onto which several fibers were stuck. The fibers proved a perfect match to a very unusual carpet in the murderer's home, and after several tests, the criminal was pinpointed. The figures had gotten too tiny to leave room for the possibility of anybody else committing the crime. This was the first case in which the perpetrator was indentified solely off of fiber analysis.

In class, we completed and exercise where everyone had to observe and record the properties of a variety of hair and fiber samples such as Asian hair, Caucasian colored hair, dog hair, cat hair, synthetic hair, African American hair, wool, silk, cotton, and nylon. Each sample we obtained was put under a microscope so we could view the different characterisitcs of each sample.

Throughout this lab I learned that different hair and fiber types have very distinct characteristics when viewed through a microscope. For example, Asian hair was darker on the side, lighter in the middle, and very smooth. Contrarily, cat hair  had a braided pattern and was black on the outside, but colorless in the middle. I learned that each type of fiber has a distinct pattern, such as braided, frayed, and quilted. This lab proved that hair and fiber analysis is very useful during investigations and it is a reliable source when trying to identify the possible suspects of a crime

Wednesday, November 9, 2011

Fingerprinting


History:

2,000 BC- 300AD: Fingerprints have been found on ancient Babylonian clay tablets dating to at least 2,000 BC, and by 300 AD, Chinese documents were often impressed with finger prints for business transaction seals to serve as signatures and protect against forgery.


Professor Marcello Malpighi
1686: Professor of anatomy at the University of Bologna, Marcello Malpighi, observed the ridges, loops, and spirals present in fingerprints. Out of respect of his discoveries he had a layer of skin named after him called the Malpighi layer.


1823: anatomy professor John Evangelist Purkinje of the University of Breslau discussed his thesis on the nine different fingerprint patterns.


1858: Sir William James Herschel, a British Magistrate in India, observed that no two fingerprints were the same, thereby they could be used for identifying individuals. He discovered this when he began using impressed fingerprints on contracts. Herschel's private conviction of the practical applications of fingerprints contributed to their widespread use in law enforcement and jurisprudence.


1863: Professor Paul-Jean Coulier, of Val-de-GrĂ¢ce in Paris, explains how otherwise invisible latent fingerprints could be identified on paper via iodine fuming and the importance of using a magnifying glass when identifying a suspects fingerprints.


1870-1880: Dr. Henry Faulds recognizes the importance of identification by fingerprinting and devises a classification system for fingerprints. In 1880, he publishes an article called "Nature," which discusses the idea of using fingerprints as a means of personal identification, and the use of printers ink as a method for obtaining such fingerprints. He is also credited for the first fingerprint identification of a greasy fingerprint that was left on an alcohol bottle.


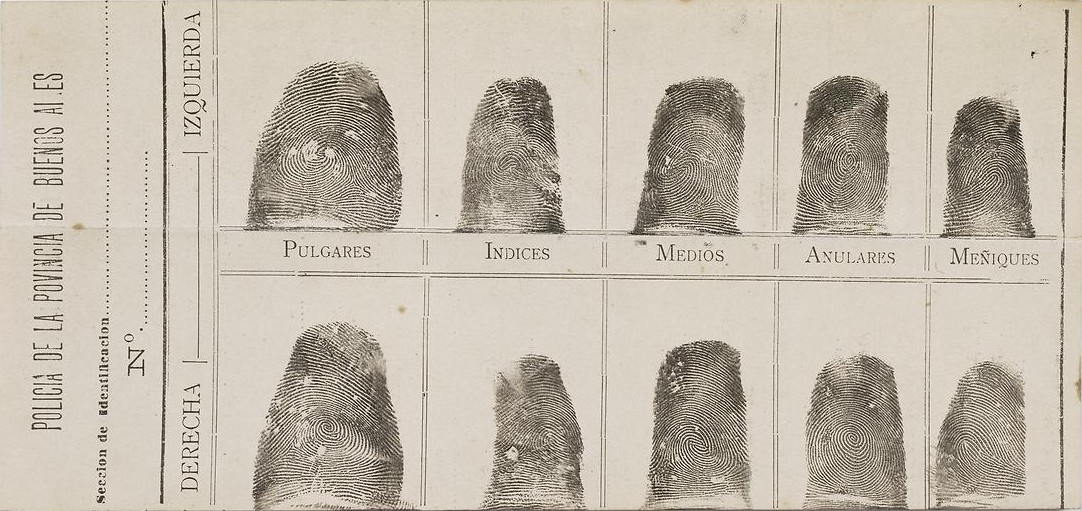
1879: In Argentina, based on Galton's pattern classifications, the first organized system of recording the fingerprints of individuals on file was developed.


1882: Gilbert Thompson was the first person in the US to use fingerprints to protect against forgery.

1882: the Bertillon System, which measures the head length and width, length of the middle finger, left foot and the forearm from the elbow to the tip of the middle finger,
was created by Alphonse Bertillon. This system is also known as Anthropometry.


1891: Juan Vucetich of the Argentine Police created one of the first fingerprint databases.


1892: The first criminal case in which fingerprints were used to aid in an investigation. A suspects thumb print was identical to a bloody one that was found on a doorknob at the scene of a murder.


1897: On June 12th, the Council of the Governor General of India approves a committee report that fingerprints should be used for classification of criminal records. Also, Haque and Bose, who worked in the world's first Fingerprint Bureau, the Calcutta Anthropometric Bureau, were two Indian fingerprint experts who were credited with the primary development of the Henry System of fingerprint classification.


1900: Mr. Edward Richard Henry lead to the replacement of the Bertillon system after the explanation his book, "The Classification and Use of Fingerprints," before United Kingdom Home Secretary Office.


1901: Mr. Edward Richard creates the Fingerprint Branch at New Scotland Yard using his system of fingerprint classification.


1902: Fingerprints were first systematically used in the U.S with the help of Dr. Henry P. DeForrest.


1903: NY state prison begins using a fingerprint identification system for criminals in the U.S.


1905: U.S. army began the using fingerprints, followed by the US Marines in 1906.


1918: Edmond Locard determined that identical 12 points between two fingerprints would be sufficient to prove a positive identification.

1924: Congress passes an act that established the Identification Division of the FBI.


1946: FBI had processed 100 million fingerprint cards in manually maintained files.


1971: FBI had manually processed 200 million fingerprint identification cards. The automated fingerprint identification system was then introduced and the files were computerized. It was recognized that many records were duplicates, and there were approximately 25-30 million different computerized files of fingerprints on record.


1974: UK began the organization of the first professional fingerprint organization, the National Society of Fingerprint Officers. The organization initially consisted of only UK experts, but quickly expanded to international scope and was renamed The Fingerprint
Society in 1977


Today: the Dept. of Homeland Security operates the largest AFIS depository, which contains over 100 million two-finger records. Fingerprints are recorded during arrests or when entering certain employment.


Types of Prints:


Direct Prints: These prints are visible to the naked eye and do not require to be developed. They can be deliberatively given, either for collection or when under arrest for a suspected criminal offense, or they could be when blood, ink, dirt, or grease on the finger come in contact with a smooth surface and in result they leave a friction ridge impression.


 Latent Prints: prints left behind from accidental contact with a surface, thereby they usually only contain parts of the whole fingerprint and are sometimes smudged, distorted, or imperfect in other ways. These prints are less accurate for identification due to their lack of the fingers ridge and groove patterns. These prints are not visible to the naked eye. These prints are formed from the water, salt, amino acids and oils found in sweat. Before these prints can be seen or photographed, they must be developed. They can be developed by dusting, fuming or through the use of chemical reagents.

 Plastic Prints: The prints create indentions that are left in a surface. They are usually found in melted candle wax, putties, thick grease, clay, and other soft, pliable surfaces. These types of prints can be viewed or photographed without the need to be developed.


Lifting/Developing Prints:

Lifting fingerprints from a crime scene is a crucial step in determining a possible suspect. Nonabsorbent, hard, and smooth surfaces usually use powder dusting to develop the prints while porous and soft surfaces usually require chemical treatment.


For example, for hard and nonabsorbent surfaces such as mirror, tile, glass, and painted wood, a forensic scientist would use a powder that contrasts with the surface that is being examined. White powder that is composed mostly of talc or aluminum is used on darker colored surfaces, mirrors, and other metallic surfaces. Contrarily, black powder used in examining fingerprints is generally made out of black carbon or charcoal and is applied to white or light-colored surfaces. These powders are usually applied lightly the use of a fiberglass or a camel's-hair brush. The power then sticks to sweat and/or body oils in the fingerprint to make it easily visualized. The prints are then normally lifted with tape, because the powder will stick to the tape while maintaining the shape of the print. Another powder that some people use is a magnetic-sensitive powder that is spread with a magna brush. Also, some investigators use fluorescent powders that can be seen under black-lights.

Iodine Fuming


Examples of soft and porous surfaces are cloth, paper, and cardboard- these surfaces require some form of chemical treatment to develop a print. Chemicals are commonly used to visualize latent prints via iodine fuming, silver nitrate, ninhydrin powder along with a suitable solvent (such as acetone or ethyl alcohol), and super glue fuming. Iodine fuming is the oldest and most common chemical treatment used to lift prints.


Shapes of Prints:

There are three basic shapes of fingerprints: arches, whorls, or loops. Arches look like a bump in the lines on your fingerprint. They can be gradual or steep. Whorls appear to be circles on your finger. They can be simple circles, or have a more sophisticated pattern. Loops look like waves in your fingerprint. Like whorls, they can be simple, or more intricate in nature.


Whorls contain two or more deltas and have some ridges that go in a circle at least one time
There are four different types: Plain whorl, central pocket whorl, double-loop whorl, and accidental whorl. About 25% of all prints are whorls.


Plain whorl: in these whorls, the ridges make a turn of one complete circuit and, therefore, are circular or spiral in shape. The plain whorl is the simplest form of whorl and the most common. There are at least two deltas and a ridge whose circuit may be spiral, oval or circular in shape.


Double-loop whorl: Whorl that contains two separate loops, two deltas, and one or more ridges that flow in a circle. In each of these formations, there are two entirely separate and distinct sets of shoulders and deltas.


Central pocket loop whorl: Whorl that contains two deltas and has two or more ridges that flow in a circle. They also have an obstruction at right angle of the flow. One or more of the simple curves of the plain whorl re-curves a second time.


Accidental whorl: Contains two different patterns(other than plain whorl) with two deltas or a pattern that contains one, or doesn't fit the descriptions of the other types.


Loops contain one delta, and on one side of that delta the ridges curve and go backwards; they are determined by which direction they face: radial/ulnar. Loops constitute approximately 70% of all prints.
Radial loop: Loops that flow toward the radius bone of the hand or, in other words, when the downward slope of the loop is from the direction of the little finger toward the thumb of the hand.


Ulnar loops: these are loops that flow toward the ulna bone of the hand or, in other words, when the downward slope of the loop is from the direction of the thumb toward the little finger of the hand.
Arches: The ridges go across the finger but do not make backward turns.
There are two types of arches: Plain arch, tented arch. Arches account for approximately 5% of all fingerprints.

            
Plain arch: Starts on one side of the finger, and then the ridge cascades upward slightly, then continues its journey along the finger to the other side.


Tented arch: Similar to the plain arch, but contains ridges, which adjoin each other in the center, converge and thrust upward, giving the impression of a pitched tent.

Classroom Activity:
On the first day of fingerprinting, everyone completed a Modus Operandi form:
As shown above, this form requires information such as a person's name, height, weight, shoe size, hair color, blood type and dominant hand. Along with this data, we had to take our fingerprints for each finger on both our right and left hands. We then had to identify each print type by using examples of each type and a magnifying glass.
The next day we used a whire powder to lift our prints off of a dark surface- we used a table in the classroom. When put tape over the powdered print to lift them, and then put the tape on a piece of black construction paper.

We did the same thing with a black powder to identify our prints on a glass surface. After we could see our prints, we used a piece of tape to lift them- just as we did with the white powder on the dark surface. The pieces of tape with the black-powdered finger prints we placed on a small piece of white paper:
After completing these activites, I discovered that it was extremely to lift prints, as I encountered many difficulties throughout the exercise.